I used to think "meal prep went bad" was something that happened to other people. Then, in week three of my first real prep run, I opened a Tuesday container of chicken and rice and got hit with the smell — that sharp, ammonia edge you can't unlearn. I'd cooked Sunday night, let it cool on the counter for almost three hours because I was tired, then stacked it in a fridge that ran at 42°F. By Tuesday the chicken was gray and the rice had that faint sour tang. I threw out four containers and ate takeout for two days. That was the $40 lesson that got me serious about storage. How long does meal prep actually last? Less than you think if you skip the basics — and longer than you'd hope if you do them right.
This guide is every storage rule I now follow without thinking. You'll get exact fridge and freezer timelines for the foods you actually prep, the techniques that bought me a solid extra two to three days of freshness, and the food-safety lines I don't cross. No theory — just what kept my 42-pound loss on track without a single repeat of the week-three smell.
Table of Contents
1. The Ultimate Meal Prep Storage Timeline: Fridge vs Freezer
This is the chart I wish I'd had taped to my fridge in week one. All times assume your refrigerator is at or below 40°F (4°C) and your freezer is at 0°F (-18°C). My own fridge sits at 37°F, and I genuinely get the upper-end numbers below. If yours runs warmer — most do — knock a day off every fridge figure.
My Storage Numbers (what I actually see on a 37°F fridge)
| Metric | What I Track |
|---|---|
| Fridge set point | 37°F (3°C) — one notch colder than factory default, bought me a full extra day on chicken |
| Chicken + rice, stored separately | Safe through day 5 — this is my default 5-day plan combo |
| Containers I tossed in year one | About 11 — almost all from letting food cool too slow or a loose lid |
| Cooling a pot of chili, ice-bath method | ~25 minutes to fridge-ready, down from 2+ hours on the counter |
| Waste after I started labeling | Near zero — I stopped "smell-testing" mystery containers |
| Food | Fridge (40°F / 4°C) | Freezer (0°F / -18°C) | Storage Tips |
|---|---|---|---|
| Cooked chicken breast | 3–4 days | 2–3 months | Slice before freezing for faster thawing; store in the coldest part of fridge |
| Cooked ground beef/turkey | 3–4 days | 2–3 months | Drain excess fat before storing — fat goes rancid faster than lean meat |
| Cooked fish (salmon, cod, tilapia) | 2–3 days | 2–3 months | More delicate than meat — eat sooner rather than later; wrap tightly |
| Cooked shrimp | 3–4 days | 2–3 months | Keep in airtight container — shrimp odor spreads through fridge fast |
| Cooked pork (chops, tenderloin) | 3–4 days | 2–3 months | Slice thin before storing — reheats more evenly |
| Tofu (cooked or pressed) | 4–5 days | 3 months | Freezing changes texture (chewier) — some people prefer it this way |
| Hard-boiled eggs | 7 days | Not recommended | Keep in shell until ready to eat; peeled eggs dry out in 2 days |
| Cooked rice | 3–4 days | 1–2 months | Cool quickly after cooking; rice left at room temp is a food safety risk |
| Cooked pasta | 3–5 days | 1–2 months | Toss with a tiny amount of oil to prevent sticking; slightly undercook if freezing |
| Quinoa | 3–4 days | 2–3 months | Lasts longer than rice — great for 5-day meal prep plans |
| Cooked sweet potato | 3–4 days | 2–3 months | Cube or mash before freezing; whole frozen sweet potatoes thaw unevenly |
| Roasted vegetables (broccoli, peppers, carrots) | 3–4 days | 2–3 months | Cool completely before sealing; condensation = soggy vegetables |
| Raw chopped vegetables | 3–5 days | Not recommended | Peppers and onions freeze OK for cooking; cucumbers and lettuce do not |
| Leafy greens (washed, dried) | 3–5 days | Not recommended | Store with paper towel to absorb moisture; never freeze raw greens |
| Salad (dressed) | 1–2 days | Not recommended | Dressing wilts greens within hours — keep dressing separate until eating |
| Salad (undressed, dry greens) | 3–4 days | Not recommended | Layer: dressing on bottom, hard veg, grains, protein, greens on top |
| Cooked beans and lentils | 3–4 days | 2–3 months | Freeze in 1/2 cup portions — exactly one meal's worth of legumes |
| Soups, stews, and chilis | 3–4 days | 2–3 months | Cool completely before refrigerating — hot soup in fridge warms everything else |
| Cooked oatmeal | 3–4 days | 1–2 months | Add splash of milk when reheating — oatmeal thickens in the fridge |
| Yogurt parfaits (assembled) | 2–3 days | Not recommended | Granola gets soggy — store dry toppings separately until morning of |
| Cut fruit (berries, melon, mango) | 3–4 days | 2–3 months | Toss with lemon juice to prevent browning; frozen fruit works for smoothies |
| Scrambled eggs / egg muffins | 3–4 days | Not recommended | Reheat gently (50% power microwave); eggs turn rubbery when frozen |
Data: USDA FoodSafety.gov — Cold Food Storage Chart (refrigerator 40°F / freezer 0°F). Fridge times reflect the USDA's general 3-4 day limit for cooked leftovers; freezer times are for quality only.
Kitchen note: The single biggest upgrade wasn't a container or a gadget — it was dropping my fridge from 42°F to 37°F. I'd been running it warm for years because the dial was vaguely "middle." One fridge thermometer later, my chicken reliably made it to Friday.
2. Storage Tips by Food Type
Proteins: Chicken, Beef, Fish, and Tofu
Protein is the most expensive part of your meal prep and the most likely to spoil. The single biggest factor in protein shelf life is how quickly you cool it after cooking. Bacteria multiply fastest between 40°F and 140°F — that's called the "danger zone." Your goal is to get cooked protein through that zone as fast as possible.
- Cool proteins within 2 hours of cooking. Don't put steaming hot chicken directly in the fridge (it heats up everything around it), but don't let it sit on the counter for 3 hours either. Let it rest 20-30 minutes at room temperature, then refrigerate.
- Slice or shred before storing. A whole chicken breast cools slower than sliced strips. Cut your protein into portions before packing — it cools faster and reheats more evenly.
- Store protein on the bottom shelf. The bottom shelf is the coldest part of most refrigerators. Raw meat goes on the very bottom (to prevent drips), cooked proteins on the shelf above.
- Fish and seafood: eat by day 2 or 3. Fish spoils faster than land animal proteins. If you prep fish on Sunday, plan to eat it by Tuesday or Wednesday at the latest. If you want fish later in the week, freeze it on prep day and thaw overnight in the fridge the night before.
- Tofu: store in water. If you've pressed and cooked tofu, store it in an airtight container. If you've just pressed it, submerge it in fresh water and change the water daily — it'll last 5 days this way.
Kitchen note: My week-three disaster was a whole chicken breast gone straight into the fridge still radiating heat. The center didn't drop below 140°F until the small hours, and that's exactly the window bacteria love. Now I slice everything and give it a 20-minute counter rest, lid off, before it touches the fridge. Not one gray container since.
Grains: Rice, Pasta, and Quinoa
Here's something most people don't know: rice is one of the highest-risk foods for food poisoning. Uncooked rice contains Bacillus cereus spores that survive cooking. If cooked rice sits at room temperature too long, those spores activate and produce toxins that reheating won't destroy.
- Cool rice within 1 hour. Spread it on a baking sheet to cool fast if you've made a large batch. Once cool, portion into containers and refrigerate immediately.
- Reheat rice to 165°F. When you reheat rice later in the week, make sure it's steaming hot all the way through. A microwave on high for 1-2 minutes usually does it.
- Quinoa is more forgiving than rice. It lasts 5-7 days in the fridge versus 4-6 for rice, and it freezes better. If you're prepping for 5+ days, quinoa is the safer grain choice.
- Pasta: toss with a tiny amount of oil. This prevents it from becoming a solid block. Olive oil works, but avocado oil is flavor-neutral and won't clash with different sauces.
- Don't mix grains with sauce until day-of. Plain rice or pasta lasts longer than rice already mixed with teriyaki sauce. Keep components separate and combine when you pack your lunch bag.
Kitchen note: I learned the rice rule the hard way — a batch I left on the stove to "cool" for three hours gave me a 2 a.m. stomach ache. Bacillus cereus doesn't care that the rice smelled fine. Now rice is spread on a sheet pan and in the fridge inside an hour, every single time.
Vegetables: Roasted, Raw, and Leafy Greens
Vegetables are the safest category in meal prep — most foodborne illness comes from animal products and grains. But vegetables can still spoil in ways that ruin your meals even if they won't make you sick.
- Roasted vegetables: cool completely before sealing. If you put warm roasted broccoli in a sealed container, condensation forms, pools at the bottom, and turns your vegetables into mush within 2 days. Let them cool on the baking sheet first.
- Leafy greens: the paper towel trick. Place a dry paper towel in the container with your washed greens. It absorbs excess moisture and extends life by 2-3 days. Replace the paper towel if it gets soaked.
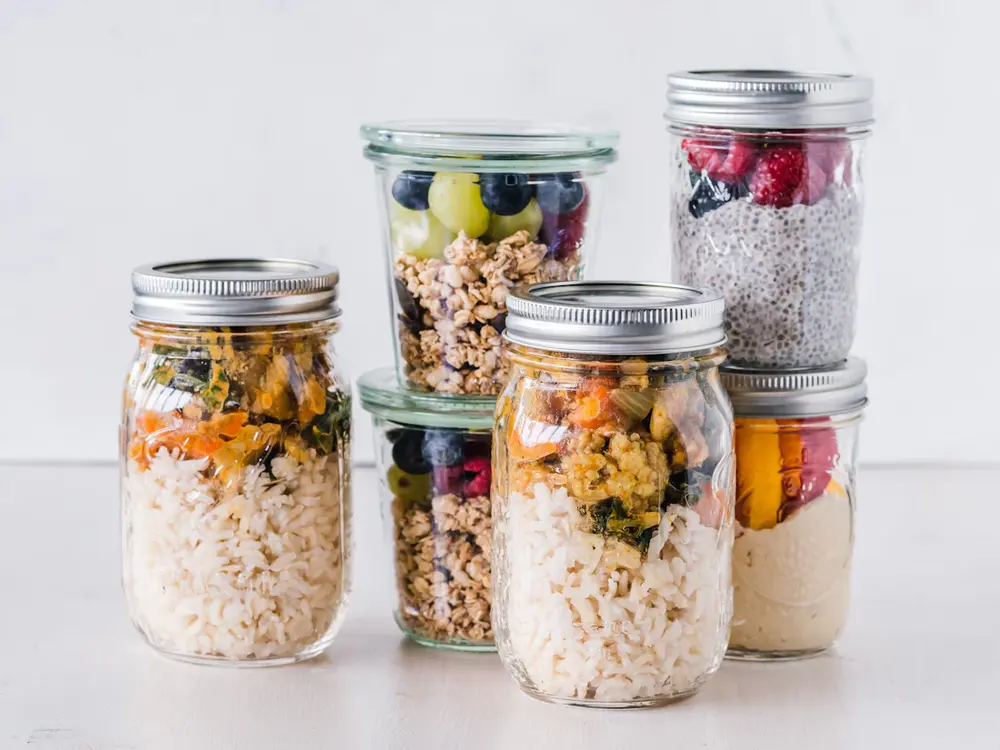
- Salads in jars: layer strategically. Dressing on the bottom, then hard vegetables (carrots, peppers, cucumbers), then grains or protein, then greens on top. The greens stay crisp because they never touch the dressing until you shake the jar.
- Avoid washing berries until you eat them. Moisture is mold's best friend. Wash berries the morning you plan to eat them, not on prep day. Store them in a container lined with paper towel, unwashed, in the fridge.
Kitchen note: The first time I prepped roasted broccoli, I lidded it while it was still steaming. By Wednesday it was a green sludge at the bottom of the container. Now I spread veg on the sheet pan until it's room temp — usually 20 minutes — before it goes near a lid. Crisp all week.
3. Food Safety Basics Every Meal Prepper Should Know
You don't need a food handler's certificate to meal prep safely. But you do need to know a few non-negotiable rules. These come from the USDA and FDA food safety guidelines (Clean, Separate, Cook, Chill), simplified for home cooks — and hardened by my own mistakes.
The Danger Zone: 40°F to 140°F (4°C to 60°C)
Bacteria multiply fastest in this temperature range. Your food should spend no more than 2 hours total in the danger zone — and that's cumulative time, counting from the moment it drops below 140°F after cooking. On a hot day (above 90°F/32°C), cut that to 1 hour. This means:
- Don't let cooked food sit on the counter "just cooling" for hours.
- Don't leave your lunch bag in a hot car and eat it 4 hours later.
- At a barbecue or potluck, food on the serving table should be eaten or refrigerated within 2 hours.
Cooling Food the Right Way
The faster food cools, the longer it lasts. Three techniques that actually work:
- Shallow containers. Food in a deep container takes forever to cool in the center. Spread soups, stews, and large batches of rice into shallow containers no more than 2 inches deep for rapid cooling.
- Ice bath. Place your pot of soup or chili in a sink filled with ice water. Stir occasionally. It'll cool to fridge-ready temperature in 20-30 minutes instead of 2+ hours.
- Divide and conquer. A family-size portion of chicken and rice will cool much faster split into 5 individual meal prep containers than left in one big container.
Reheating Safely
When you reheat meal prep, the target temperature is 165°F (74°C) — steaming hot throughout. A few practical guidelines:
- Microwave: stir halfway through. Microwaves heat unevenly. Stop at the halfway point, stir or rearrange the food, then continue. This eliminates cold spots where bacteria survive.
- Stovetop: add a splash of water. When reheating rice or pasta on the stove, add 1-2 tablespoons of water and cover with a lid. The steam reheats more evenly than dry heat.
- Only reheat once. Don't reheat the same portion of food, eat half, put it back in the fridge, and reheat it again tomorrow. Each reheat cycle is another trip through the danger zone. Portion before you reheat.
- Frozen meals: thaw in the fridge overnight. Never thaw meal prep on the counter. The outside of the container reaches room temperature while the center is still frozen — that's a bacteria breeding ground.
Fridge Organization for Food Safety
The way you arrange your fridge matters. Follow this top-to-bottom order:
- Top shelf: Ready-to-eat foods (leftovers, prepared meals, drinks).
- Middle shelves: Dairy, eggs, deli meats.
- Bottom shelf: Raw meat and fish (in a container or on a plate to catch drips).
- Crisper drawers: Vegetables and fruits (keep them separate — fruits release ethylene gas that speeds up vegetable spoilage).
This arrangement prevents cross-contamination: if raw chicken leaks, it won't drip onto your prepped meals below because there's nothing below it but the fridge floor.
4. How to Tell If Your Meal Prep Has Gone Bad
Expiration dates on meal prep are guidelines, not guarantees. Your food might spoil earlier (fridge too warm) or last longer (fridge very cold, food handled properly). Always trust your senses over the calendar.
The Four-Step Spoilage Check
Step 1: Look
Open the container and examine the food in good light. Look for: mold (any color — white fuzz, green spots, black dots are all mold), discoloration (meat turning gray or green, vegetables developing dark spots), cloudy or slimy liquid pooling in the container, separation that wasn't there before (especially in sauces and soups). If you see any of these, discard immediately — don't taste it.
Step 2: Smell
Fresh cooked food should smell neutral or pleasant. Warning signs: sour or acidic smell (common in spoiled grains and vegetables), ammonia or sulfur smell (common in spoiled proteins, especially chicken and fish), yeasty or fermented smell (common in spoiled fruits and starchy foods). Trust your nose — humans evolved to detect food spoilage by smell. If it smells wrong, it is wrong.
Step 3: Touch (If Still Unsure)
Touch the surface of the food with a clean utensil. Warning signs: slimy or sticky film on meat or vegetables, unusual mushiness (beyond normal softening from refrigeration), tacky or gummy texture on grains. Wash your hands after touching — don't cross-contaminate.
Step 4: Taste (Last Resort, Tiny Amount)
If the food passed looking, smelling, and touching but you're still suspicious, taste a pea-sized amount. Any sour, bitter, or "off" flavor means the food is spoiled — spit it out, rinse your mouth, and discard the entire container. Do not "eat around" a bad spot. If mold is visible anywhere, the entire container is contaminated, even if other parts look fine.
Kitchen note: The smell test only failed me once, and that was the time I talked myself into "it's just the spices" on a container of turkey. It wasn't. Since then the rule is absolute: if I hesitate for even a second, it goes. My nose has been right 100% of the time; my optimism, not so much.
Food-Specific Spoilage Signs
| Food | Safe (Normal) | Spoiled (Discard) |
|---|---|---|
| Cooked chicken | White to light tan, firm, neutral smell | Slimy surface, gray or green tint, sour smell |
| Cooked beef | Brown-gray, firm, neutral smell | Slimy, sticky, sour or ammonia smell |
| Cooked fish | Flakes easily, mild ocean smell | Strong "fishy" or ammonia smell, mushy texture |
| Cooked rice | Firm grains, neutral smell, dry appearance | Mushy, sour smell, sticky or slimy texture |
| Cooked pasta | Firm, separates easily, neutral smell | Mushy, sour smell, grayish color |
| Roasted vegetables | Slightly softened, normal color, neutral smell | Slimy, mold spots, sour or fermented smell |
| Salad greens | Crisp, bright green, no odor | Wilted, slimy, brown edges, rotting smell |
| Soups and stews | Uniform consistency, normal color | Sour smell, bubbling (fermentation), mold on surface |
5. Container Tips for Longer-Lasting Meal Prep
The containers you use directly affect how long your food stays fresh. A cheap takeout container with a loose lid will give you 2-3 days. A quality airtight container with the right material will give you 5-6 days from the same food. Here's what matters and what doesn't.
Glass vs. Plastic: Which Keeps Food Fresher?
Glass wins for freshness. Here's why: glass is non-porous, so it doesn't absorb food odors or stains. It cools faster (better thermal conductivity), which means your food spends less time in the danger zone after you pack it. Glass containers with snap-lock lids with silicone gaskets create a true airtight seal. The downside: glass is heavy, breakable, and more expensive.
Plastic is fine if you choose the right kind. Look for BPA-free containers with 4-sided snap-lock lids (not just two clips). Avoid containers where the lid just presses on — these leak air, moisture, and odors. Plastic is lighter, cheaper, and doesn't shatter. The tradeoff: even good plastic eventually absorbs odors and stains, which can transfer to your food over time.
Kitchen note: For my first two months I reused takeout containers with press-on lids. Every single one went dry and fridge-smelling by day three. Swapping to glass with silicone gaskets was the difference between "edible Wednesday" and "still good Friday." The weight bugs me on commute days, but the freshness win is not close.
Container Features That Actually Matter
- Airtight seal. This is non-negotiable. Without it, your food dries out in 1-2 days and absorbs every odor in your fridge. Look for silicone gaskets and locking mechanisms on all four sides.
- Stackable design. Square and rectangular containers use fridge space 40% more efficiently than round ones. If your containers don't stack neatly, half your fridge space is wasted air gaps.
- Portion-appropriate sizes. A 4-cup container for a 1-cup meal leaves too much air inside — and air contains bacteria and causes drying. Fill containers to at least 75% capacity.
- Microwave-safe without the lid. Even BPA-free plastic lids shouldn't go in the microwave. Glass containers can be microwaved lid-free; plastic containers should have vented lids or you should microwave uncovered.
For specific container recommendations and a full comparison, read our guide: Best Meal Prep Containers for Weight Loss. In a hurry? Browse top-rated glass containers on Amazon. For fewer containers and less cleanup, try Simple Meal Prep: 5 Ingredients or Less.
The "Label Everything" Rule
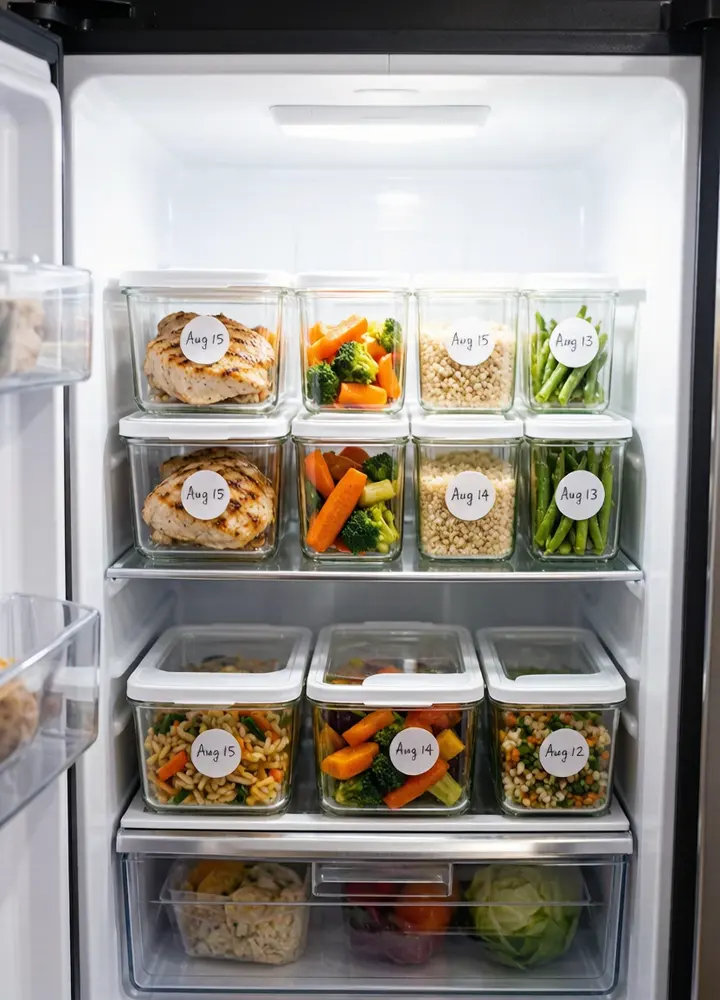
You will not remember when you cooked that chicken. Not on Tuesday. Not on Thursday. Not ever. Label every container with the date you cooked the food and what's inside. Use masking tape and a Sharpie, or buy reusable labels. When you open the fridge on Thursday and see five identical containers, this 10-second habit saves you from the "smell test" on every single one.
Kitchen note: I once believed I'd "remember which is which." I did not. By Thursday I was sniffing five near-identical containers like a lab technician. Masking tape and a Sharpie ended that ritual — now I label the cook date on every lid, and the mystery is gone.
6. Frequently Asked Questions
Most cooked meal prep lasts 3-5 days in a properly cold refrigerator (40°F/4°C or below). In my own fridge at 37°F, chicken and rice stored separately are still solid on day five. Cooked proteins like chicken, beef, and turkey are safe for 3-4 days. Cooked grains like rice and quinoa last 4-6 days. Roasted vegetables last 3-5 days. Fish is the exception — eat it within 2-3 days. These timelines assume you cooled the food properly after cooking and stored it in airtight containers. If your fridge runs warm or you left food out for hours after cooking, shorten all timeframes by at least a day.
Most meal prep foods freeze well for 2-3 months, but not everything survives the freezer. Proteins (chicken, beef, turkey, pork) freeze excellently. Cooked grains, soups, stews, and beans also freeze well. Foods that do NOT freeze well include: leafy green salads, yogurt-based sauces (they separate), hard-boiled eggs (rubbery texture), fried foods (soggy when reheated), and raw vegetables intended to be eaten raw (cucumbers become mush). For best results, portion meals into individual containers before freezing, press out as much air as possible, and label with the date. Always thaw in the fridge overnight — never on the counter.
Storing meal prep for weight loss is about portion control through packaging. The strategy: (1) Pre-portion everything into individual meal-sized containers immediately after cooking — this stopped my "just a little more" scoop when I was hungry. (2) Use containers that are appropriately sized for your calorie goals (2-cup containers for 400-500 calorie meals, 1-cup containers for snacks). (3) Keep high-calorie components (dressings, sauces, cheese, nuts) in separate small containers so you can measure precisely when you eat. (4) Store prepared vegetables at eye level in the fridge — you're 3x more likely to eat what you see first. (5) Freeze half your prep immediately so you're not tempted to eat 7 days of food in 4 days.
The mason jar method is the most reliable: pour dressing in the bottom of the jar, then layer hard vegetables (carrots, cucumbers, peppers), then protein or grains, then leafy greens on top. The greens never touch the dressing until you dump the jar into a bowl or shake it. Stored this way in the fridge, a salad stays crisp for 4-5 days. Key rule: the greens must be completely dry when you pack them. Any moisture accelerates wilting. If you're using a flat container instead of a jar, keep dressing in a separate small container and add it when you're ready to eat.
Yes, with the right technique. Chicken stays safe for 3-4 days in the fridge and rice for 4-6 days, so a 5-day chicken and rice prep is pushing the limit. Here's how I do it safely: (1) Cool both the chicken and rice rapidly after cooking (spread on baking sheets for 20 minutes). (2) Store them in separate airtight containers — don't mix until day-of. (3) Keep my fridge at 37-38°F (3°C) instead of the typical 40°F to buy an extra day. (4) For days 4 and 5, freeze those portions on prep day and thaw in the fridge the night before. (5) Reheat to 165°F — steaming hot throughout. The safest approach: prep Sunday for Monday-Wednesday, then do a quick mini-prep Wednesday evening for Thursday-Friday.
Ready to build your meal prep system?
- How to Start Meal Prep for Weight Loss: The Complete Beginner's Guide
- 15 Easy Meal Prep Ideas for Weight Loss
- Best Meal Prep Containers for Weight Loss: Full Review
Get the Free Meal Prep Storage Cheat Sheet
One-page printable PDF with the complete fridge and freezer timeline for 20+ foods, plus the 4-step spoilage check. Stick it on your fridge and never second-guess your meal prep again.
References
- USDA FoodSafety.gov — Cold Food Storage Chart
- USDA FoodSafety.gov — 4 Steps to Food Safety